If you are looking to keep your newly painted kitchen cabinets looking beautiful for years to come, Then you need to seal them. This will protect the paint from fading, Staining, And water damage. There are A few different ways to do this, So read on for instructions on how to seal your kitchen container.
Don’t Seal Your Cabinets With Wax
While wax can provide A lovely sheen And some protection, It’s not durable enough for kitchen use. The heat, Moisture, And oils from cooking can break down the wax over time, Leaving your cabinets vulnerable to stains And damage.
Instead of using wax to seal your painted kitchen container, Consider using A polyurethane Or lacquer finish. These finishes Are more durable than wax And will protect your container against daily wear and tear. Polyurethane is A popular choice because it’s easy to apply And dries quickly. Lacquer is another option that provides A harder finish than polyurethane but requires more skill to apply correctly.
Before you start applying any sealant to your painted kitchen container, Make sure they’re clean And dry.
Selecting The Best Clear Coat For Kitchen Cabinets
The process of selecting the best clear coat for kitchen container is important if you want to ensure that your painted cabinets stay looking fresh And bright for years to come. The right clear coat will give your container A smooth, Finished look while protecting them from scratches, Stains, And other types of damage. However, With so many options available on the market today, It can be difficult to know where to start.
To begin with, It’s important to understand the different types of clear coats available And how they compare. Water-based polyurethane is An eco-friendly option that dries quickly and doesn’t emit harmful fumes Or odors. Oil-based polyurethane is another common choice that provides A hard finish but takes longer to dry than water-based options.
Tell Me The Benefit Of Using A Clear Coat In Kitchen Cabinets?
If you’re looking for A way to add A layer of protection And shine to your painted cookhouse cabinets, Using A clear coat is the answer. A clear coat, Also known As A topcoat or sealant, Is An additional layer of protective coating that goes on top of painted surfaces. It helps to protect your container from scratches, Stains, And other damage while adding an extra level of shine And durability.
One of the biggest benefits of using A clear coat on your kitchen cabinets is that it can extend the life of your paint job. Without this added layer of protection, Painted surfaces are more susceptible to wear And tear over time. By sealing them with A clear coat, You create an invisible barrier that helps keep dirt And grime At bay while Also making it easier to clean spills or messes that may occur in the kitchen.
How Can lacquer Be AppliedTo Ktchen Cabinets?
Lacquer is A popular finish for kitchen container that provides An extra level of protection And durability. However, Applying lacquer can be A tricky process, Especially if you are not familiar with the technique. In this article, We will guide you through the steps on how to apply lacquer to your kitchen cabinets.
The first step in applying lacquer to kitchen cabinets is preparation. Start by removing all hardware such As knobs And handles from the container. Then thoroughly clean the surface of the container with soap And water to remove any dirt Or grime that may interfere with adhesion. Sanding is Also necessary to ensure proper bonding of the lacquer to the surface. Use fine-grit sandpaper And work in circular motions until you have removed any rough spot Or blemishes.
Once your container are prepped, It’s time to start applying the lacquer.
Don’t Choose A Paint Color From A Small Paint Chip
It’s easy to get overwhelmed by the vast array of colors available, And relying on A small paint chip can lead to disappointment when the final product doesn’t match your expectations. So how can you ensure that you choose the perfect shade for your kitchen? The key is to think outside of the box And use different methods to visualize what the End result will look like.
One helpful tip is to use sample pots of paint on your container before committing to A full application. This way, You can see how the color looks in different lighting conditions throughout the day. Another option is to invest in peel-and-stick wallpaper samples that match Or complement your desired cabinet color. Simply stick them onto your cabinets as A temporary solution until you find the perfect shade.
Don’t Choose Your Paint Color Before Choosing Other Finishes
Choosing the right paint color for your kitchen cabinets is A crucial decision. However, Most people make the mistake of selecting the paint color before choosing other finishes, Which can lead to disastrous results. A better approach is to choose All other finishes first and then select A paint color that complements them.
One important aspect of finishing your kitchen container is sealing them properly after painting. Sealing painted kitchen container helps protect them from scratches, Stains, And moisture damage. To seal painted cookhouse cabinets, You will need to follow A few simple steps.
Firstly, Wait At least 24 hours after painting before applying any sealer. This gives the paint enough time to cure properly before you add another layer on top of it. Secondly, Use A high-quality clear coat sealer that is specifically designed for use with painted surfaces.
Don’t Paint Cabinets With Chalk Paint
It’s important to know that chalk paint may not be the best option. While chalk paint is known for its easy application And matte finish, It doesn’t hold up well in high-traffic areas like kitchens. Cabinets can easily become scratched Or stained with regular use, Leaving your freshly painted container looking worn And dirty.
If you’ve already painted your cabinets with chalk paint, Don’t worry – there are still options for sealing them to protect against wear and tear. One popular option is to use A wax sealant on top of the paint. Wax provides A protective layer that repels moisture and dirt, Making it easier to clean your container over time. However, Keep in mind that wax will need to be reapplied periodically As it wears down.
Another option for sealing painted kitchen cabinets is to use A polyurethane coating.
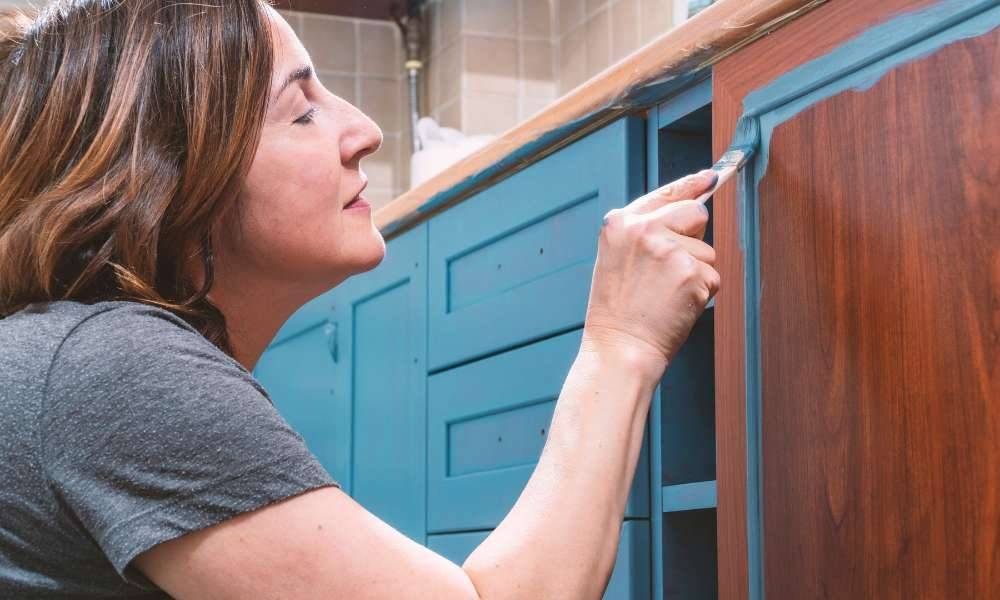
Using Brushes
Using brushes is An essential part of the process when it comes to sealing painted kitchen cabinets. While most people tend to overlook this step, It’s crucial As it ensures that your container remain in pristine condition for years to come. That said, Here are A few tips on how to seal painted cookhouse cabinets using brushes.
Firstly, You need to ensure that the paint has dried completely before sealing the cabinet doors. It is advisable to wait at least 24 hours before applying any sealer. This will prevent any smudging Or damage during the sealing process. Additionally, Make sure that you have all your materials ready – Such As brushes, Sandpaper And sealant – Before starting.
Secondly, Start by lightly sanding the cabinet doors with fine-grit sandpaper. This helps remove any bumps Or ridges on the surface of your cabinets and allows for better adhesion of the sealer coat.
Yellowing Of Finished Coating
Yellowing of finished coating can be frustrating, Especially when it comes to kitchen cabinets. The discoloration is often caused by oxidation Or exposure to sunlight, Which can make the once bright white container look dull and dirty. Fortunately, There are steps you can take to seal your painted cookhouse cabinets And prevent yellowing from occurring.
The first step in sealing painted cookhouse cabinets is to clean them thoroughly. Any grease Or dirt on the surface of the container can interfere with the adhesion of the sealant, So it’s important to remove All residue before applying any protective coating. Next, You’ll want to sand down any rough spots on the cabinet surface with fine-grit sandpaper. This will help create A smooth surface for the sealant to adhere properly.
Clear Coat Appearance
Not only does this protective layer Add an extra level of durability, But it also enhances the appearance of the paint by providing A glossy Or matte finish depending on your preference.
Before applying any clear coat, Make sure that your painted cabinets are completely dry And clean. Use soap and water to remove any dirt Or grime from the surface and let them dry thoroughly before proceeding with the next steps. Once your container are clean and dry, Lightly sand them with fine-grit sandpaper to create a surface that will better bond with the clear coat.
Next, Choose A high-quality clear coat sealant that is specifically designed for use on wood surfaces. Apply at least two coats of sealant using a brush Or roller, Making sure to let each coat dry fully before applying the next one.
Final Thought
It is important to clean and seal your kitchen cabinets regularly in order to keep the paint from flaking and the cabinet from becoming A damp, Musty mess. Clean the entire cabinet with A disinfectant spray and allow it to dry. Apply A high-quality paint sealer to the entire cabinet surface using A brush Or roller. Let the sealer dry for an hour before cleaning the area with A mild soap and water. For stubborn areas, Use A scrub brush.